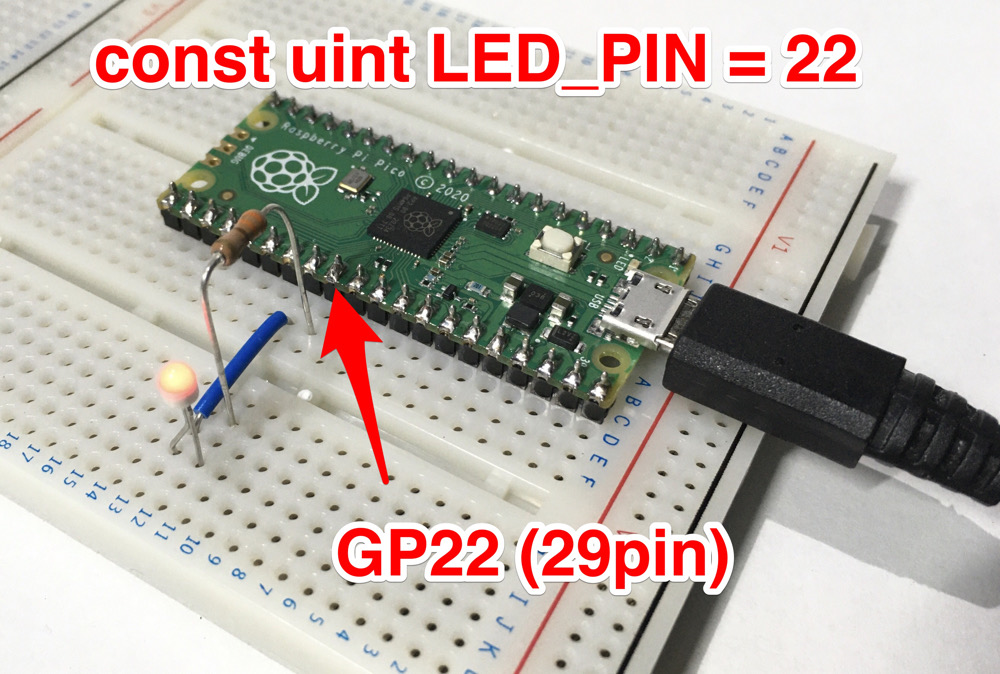
本日、Raspberry Pi Picoが届いたので早速Lチカを試しました。
Picoの母艦はRaspberry Pi 4(以下ラズパイ4)です。
開発環境はラズパイ公式サイトのWelcome to your Raspberry Pi PicoにあるGetting started with Raspberry Pi Picoの絵を見て整えました。英文なので主に絵を参考にします。半分冗談です、ごめんなさい。
上記リンク先にある「Chapter 1. Quick Pico Setup」から始まるグレーのボックスに書かれたコマンドラインを参考にして、ラズパイ4に開発環境を整えました。↓
$ wget https://raw.githubusercontent.com/raspberrypi/pico-setup/master/pico_setup.sh

$ chmod +x pico_setup.sh

$ ./pico_setup.sh

$ sudo reboot
$ cd ./pico/pico-examples/build/

$ export PICO_SDK_PATH=../../pico-sdk

$ cmake ..
↑ これで ./pico/pico-examples/ にあるサンプルコードがVisual Studio Codeでビルド出来る筈です。
↓ サンプルコードのピン番号を変えただけですが、Lチカに使用したコードです。
#include "pico/stdlib.h"

int main() {
    const uint LED_PIN = 22;
    gpio_init(LED_PIN);
    gpio_set_dir(LED_PIN, GPIO_OUT);
    while (true) {
        gpio_put(LED_PIN, 1);
        sleep_ms(100);
        gpio_put(LED_PIN, 0);
        sleep_ms(100);
    }
}
↓ ラズパイ4にインストールされたVisual Studio Codeでビルドした時の画像。

